Yes, Refinishing Hardwood Floors Can Be A Weekend Project!

If you are lucky enough to have hardwood floors in your home, then you know how beautiful they can be. Hardwood flooring instantly warm up a space, adds character, and is extremely versatile design-wise.
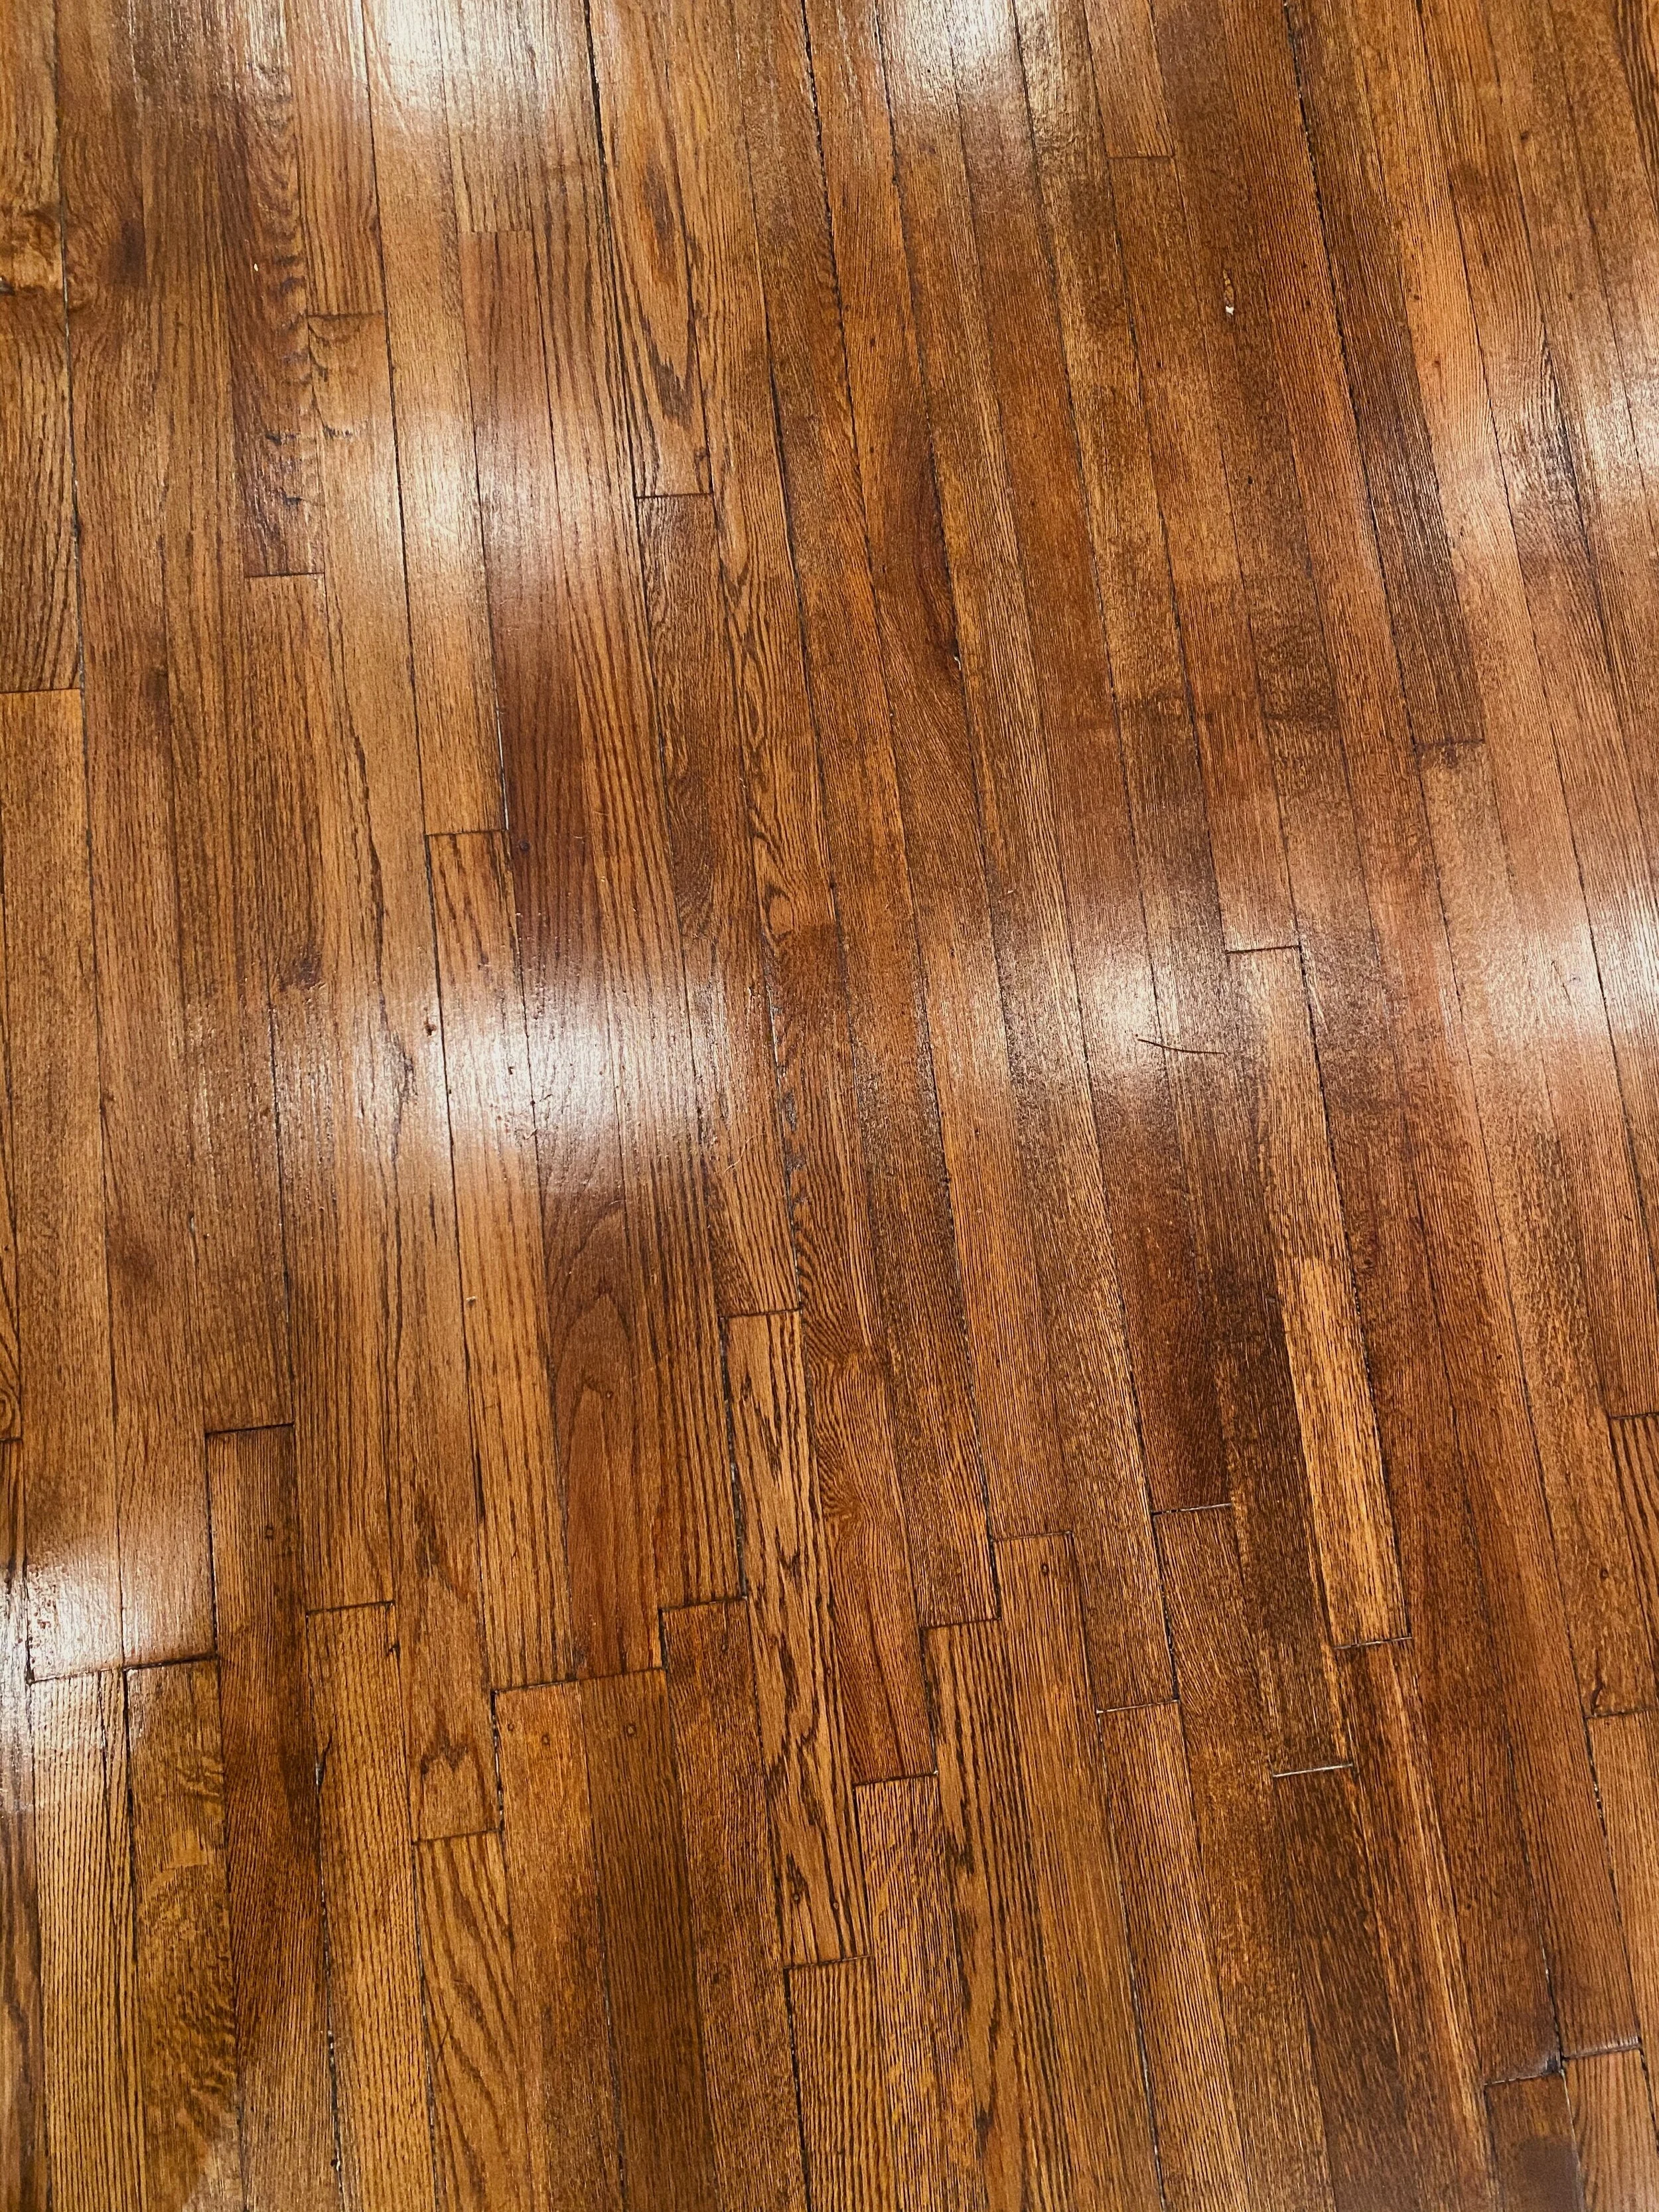
When we purchased our house, I was so excited to have hardwoods throughout. The original, 100+ year old oak floors are a true gem. That being said, when hardwood floors hang around a home for a hundred years, they tend develop quite a “patina.” At least thats what my mother lovingly calls it — she’s a very nice person.
Others may refer to the “patina” in layman terms such as scratches, scrapes, and gauges. To be fair, years of wear and tear do amount to some charming additional character. Wood floors do accumulate scratches, and thats ok! Nevertheless, in some places our floors did look pretty beat up. But, what drove me absolutely crazy was the deep orange hue of our floors. Have you ever noticed that old wood floors tend to turn orange or yellowish over time?
We can blame the chemicals used to seal wood floors for that! Most hardwood floors are sealed with an oil-based polyurethane. These oily chemicals actually turn orange over time. While I totally get that some folks absolutely love the warmth it brings to a room, we decided that in our house it was time for a change.

BEFORE: Oil-based polyurethane turns orange-y over time

Quite the “patina”
We decided that we wanted to refinish our hardwood floors ourselves. Most designers and DIY-ers will tell you this is one project that you should not DIY, and you should probably listen to them. Refinishing hardwood floors is involved, meticulous, and time-consuming. You’ve been warned.
Now, for you rebels who want to learn to do this — I like you. Barrett and I have always found that the projects we’re the most afraid of are, by far, the most rewarding. We learn so much when we dive into something head first. Once Barrett and I are on the other side of a tough project, we always look back and marvel at how far we’ve come. That has definitely been the case with this project. Experience can be such a great teacher.
I’ve never been big a fan of houses that feel like museums. However, it’s worth noting, that I can be a perfectionist at times. I always find taking on something scary is really good for me. It’s not going to turn out perfect, and thats ok! Happy little accidents happen, just ask Bob Ross.
After we decided it was time to challenge ourselves, we needed to choose a new color for the floors. We ended up testing half a dozen stains on the floor. I had my heart set on a provincial stain from the get-go, and that was reinforced after we saw the colors on the floor.

We chose provincial (fourth from left) as a nice medium, dark stain.
To test the various stains, we sanded down a small area of the floor boards with our Dewalt Hand Sander. (Be warned, this step kicks up a ton of dust. Even a small area will leave your entire room covered in one million dust particles.) After settling on provincial for our floors, we headed off to Home Depot to gather our materials. Materials will vary depending on square footage.

Our shopping list included:
Varathane Brand Wood Stain in Provincial (1 gallon)
Painters Tape
Rags
Plastic Sheeting
Shoe Covers
Large Bucket
Water-Based Polyurethane (3 gallons)
Lambs Wool Applicator
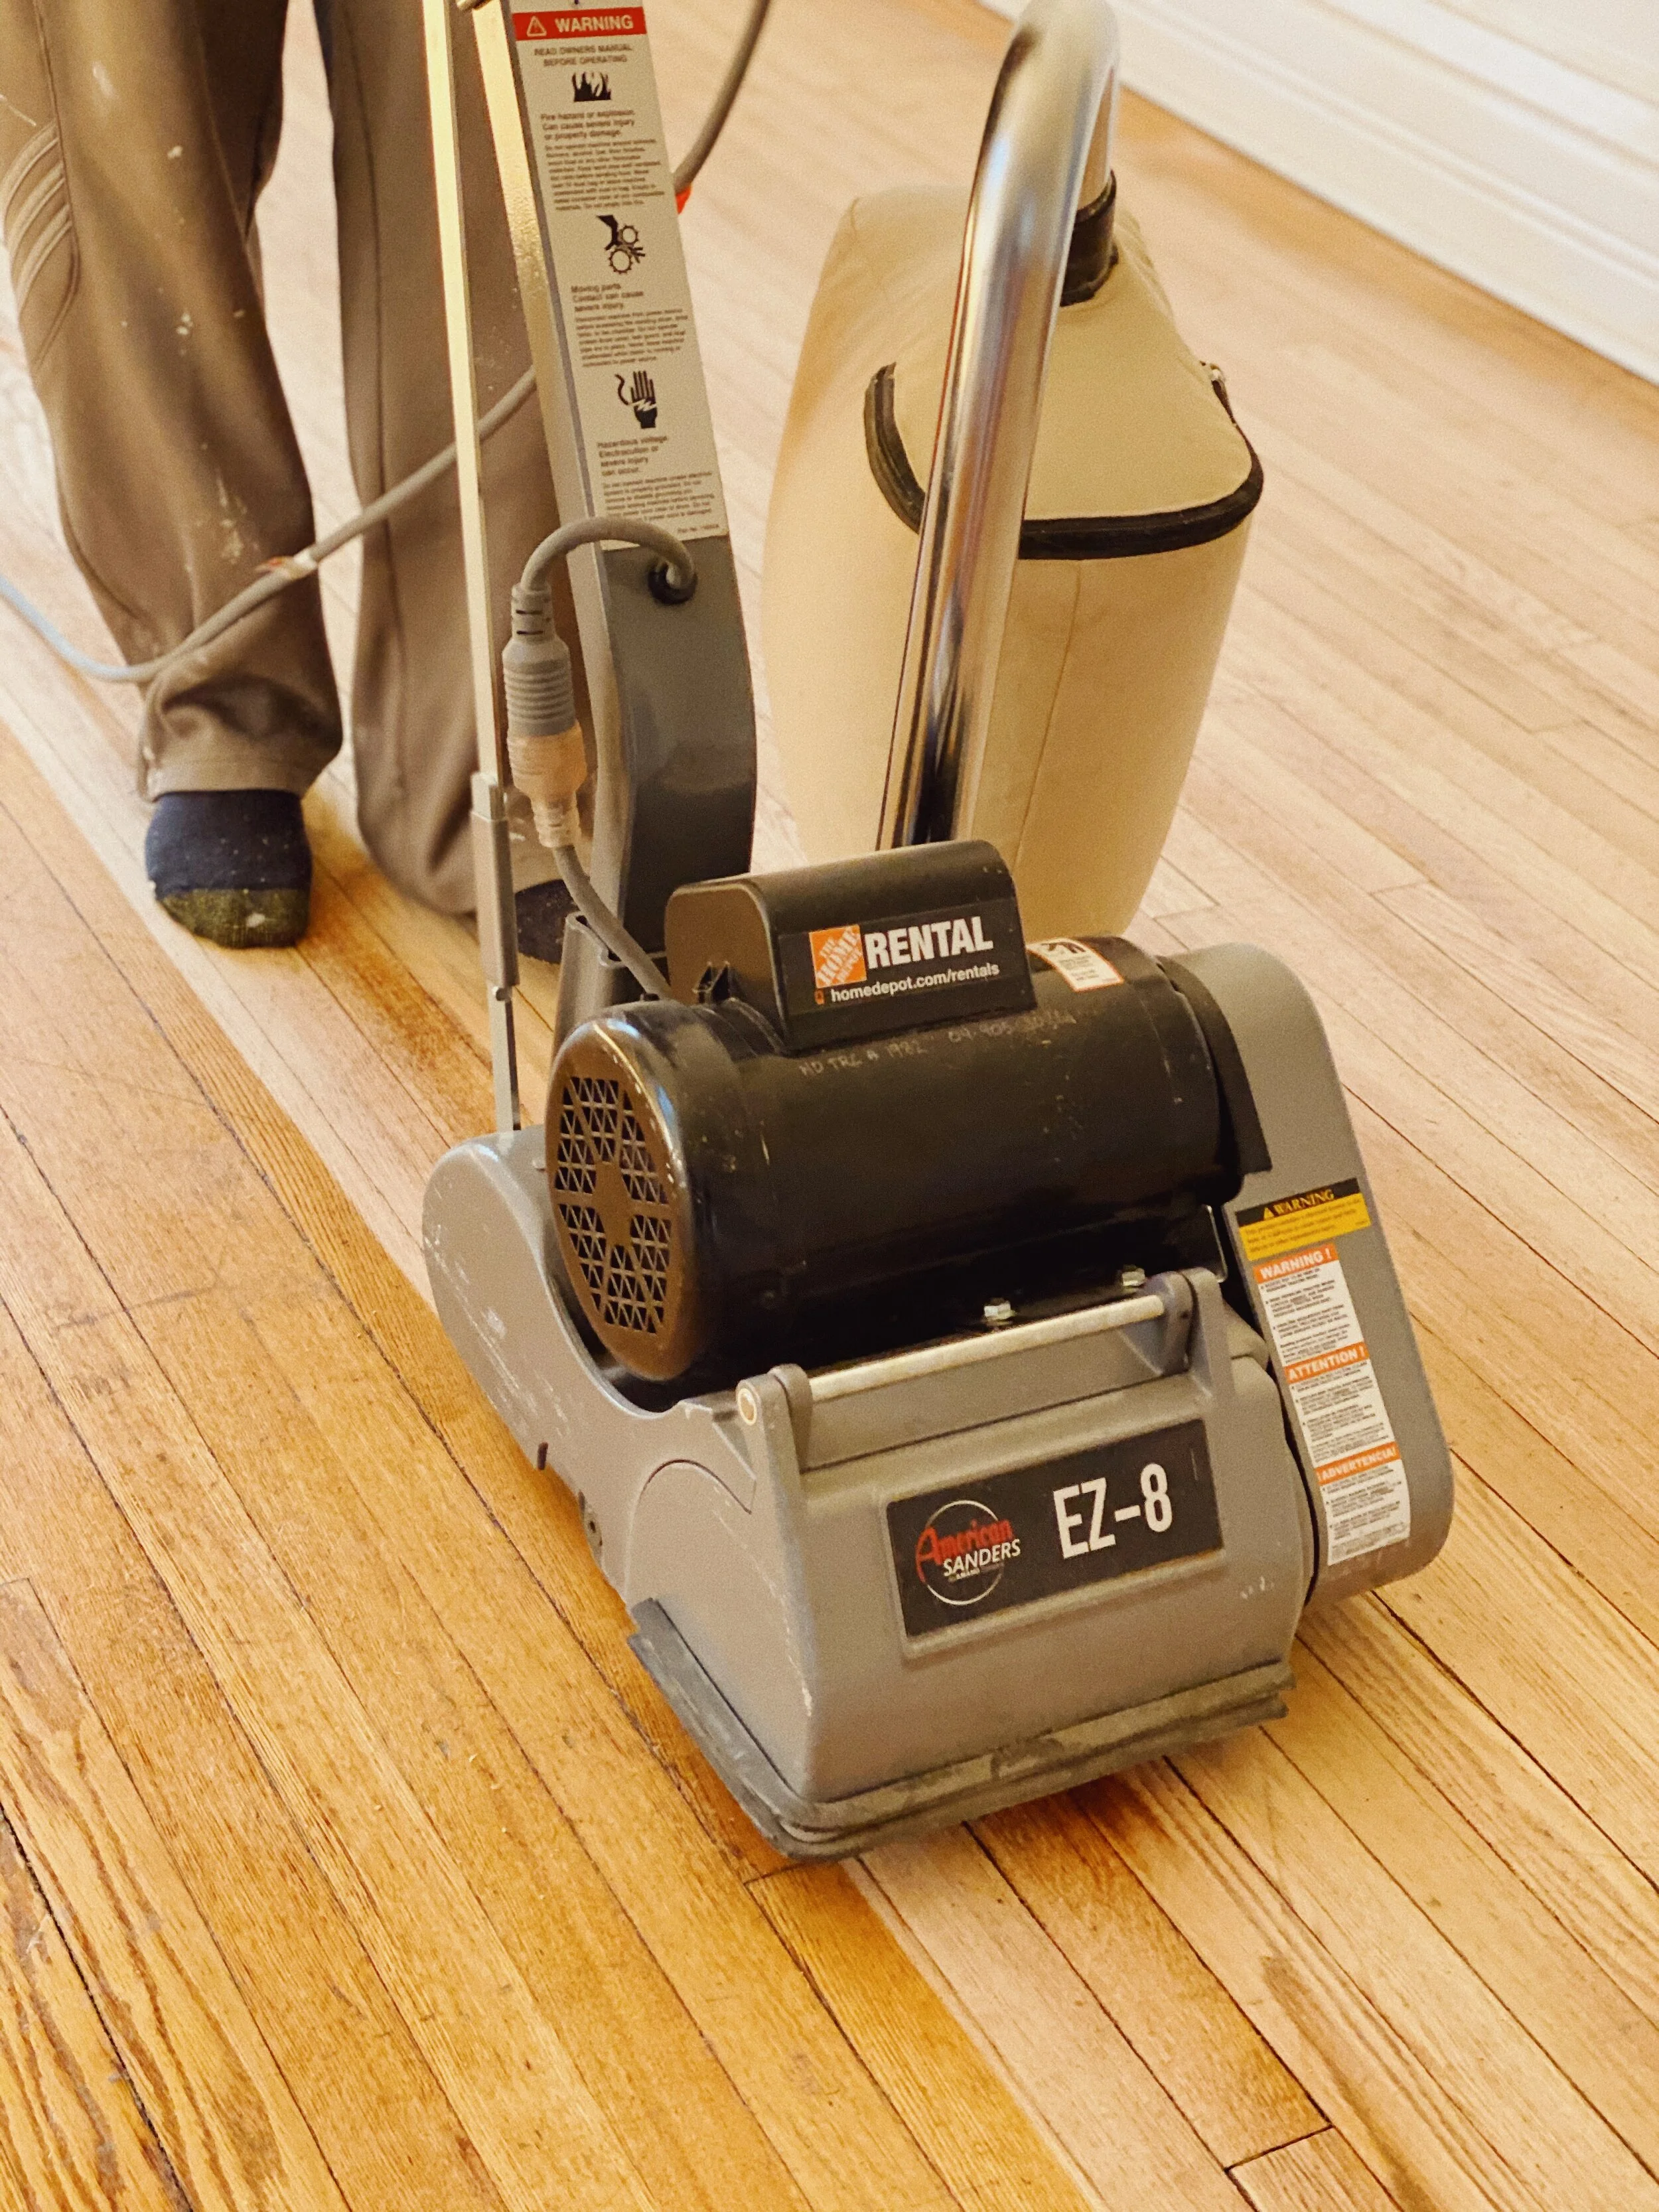
Drum Sander Rental
Sand Paper (60 grit, 120 grit)
We had some other necessary items at home, like additional sand paper and a hand sander. All of the items on our shopping list totaled about $300, including the drum sander rental. Comparatively, it would’ve been almost $2000 to have a professional refinish our hardwoods.
Once we got home, it was time to start prepping our rooms. If you have a professional refinish your floors, you’ll likely need to move out of your home for a week or more — which can add to the enormity of a project like this. Refinishing hardwood floors can often be weeks long, so be sure to prepare accordingly.
However, we were bound and determined to do this one ourselves; we had a plan. We had three rooms to refinish: living, dining, and foyer. So once we had gathered our materials, we began the time consuming task of moving completely out of these rooms.
Our dining table lived on the front porch. Our couch was in the kitchen. Small items were tucked in closets, guest bedrooms, and pretty much anywhere available.
We were left with some (very orange) empty rooms.


If I did it again, I might recommend getting a storage pod. We were certainly tripping over furniture for a weekend. However, we’re always determined to do things quickly and inexpensively, while maintaining quality.
Once the rooms were empty, it was time to sand. Sanding gets the old stain finish off the existing floor and removes the deep scratches. One of the most important steps, prior to sanding, is to seal everything off with plastic. When I say seal off everything, I mean everything. Cover all doorways, fireplaces, air vents, recessed lighting, radiators, etc with plastic. Sanding gets dust particles everywhere — I’m talking window sills, blinds, and baseboards. Your walls will be covered in a fine layer of dust that needs to be wiped down later. The plastic prevents dust from coating the rest of your home.
We used two types of sanders for this job — a drum sander and a hand sander. The drum sander we rented from Home Depot, and rigged it up with 60 grit sander paper. Step one was to practice running the sander on a piece of plywood we had laying around.

The key was to walk at an even pace. To run the sander, we walked the sander along the grain for the length of the room. Be sure to overlap your lines by half with each run.

Deep scratches we made sure to note before we began
It’s super important that the drum sander is used in the direction on the wood. Using the sander against the grain will leave very deep scratches in the wood and can damage your hardwood floors. Additionally, holding the sander in one place can definitely damage your floors.
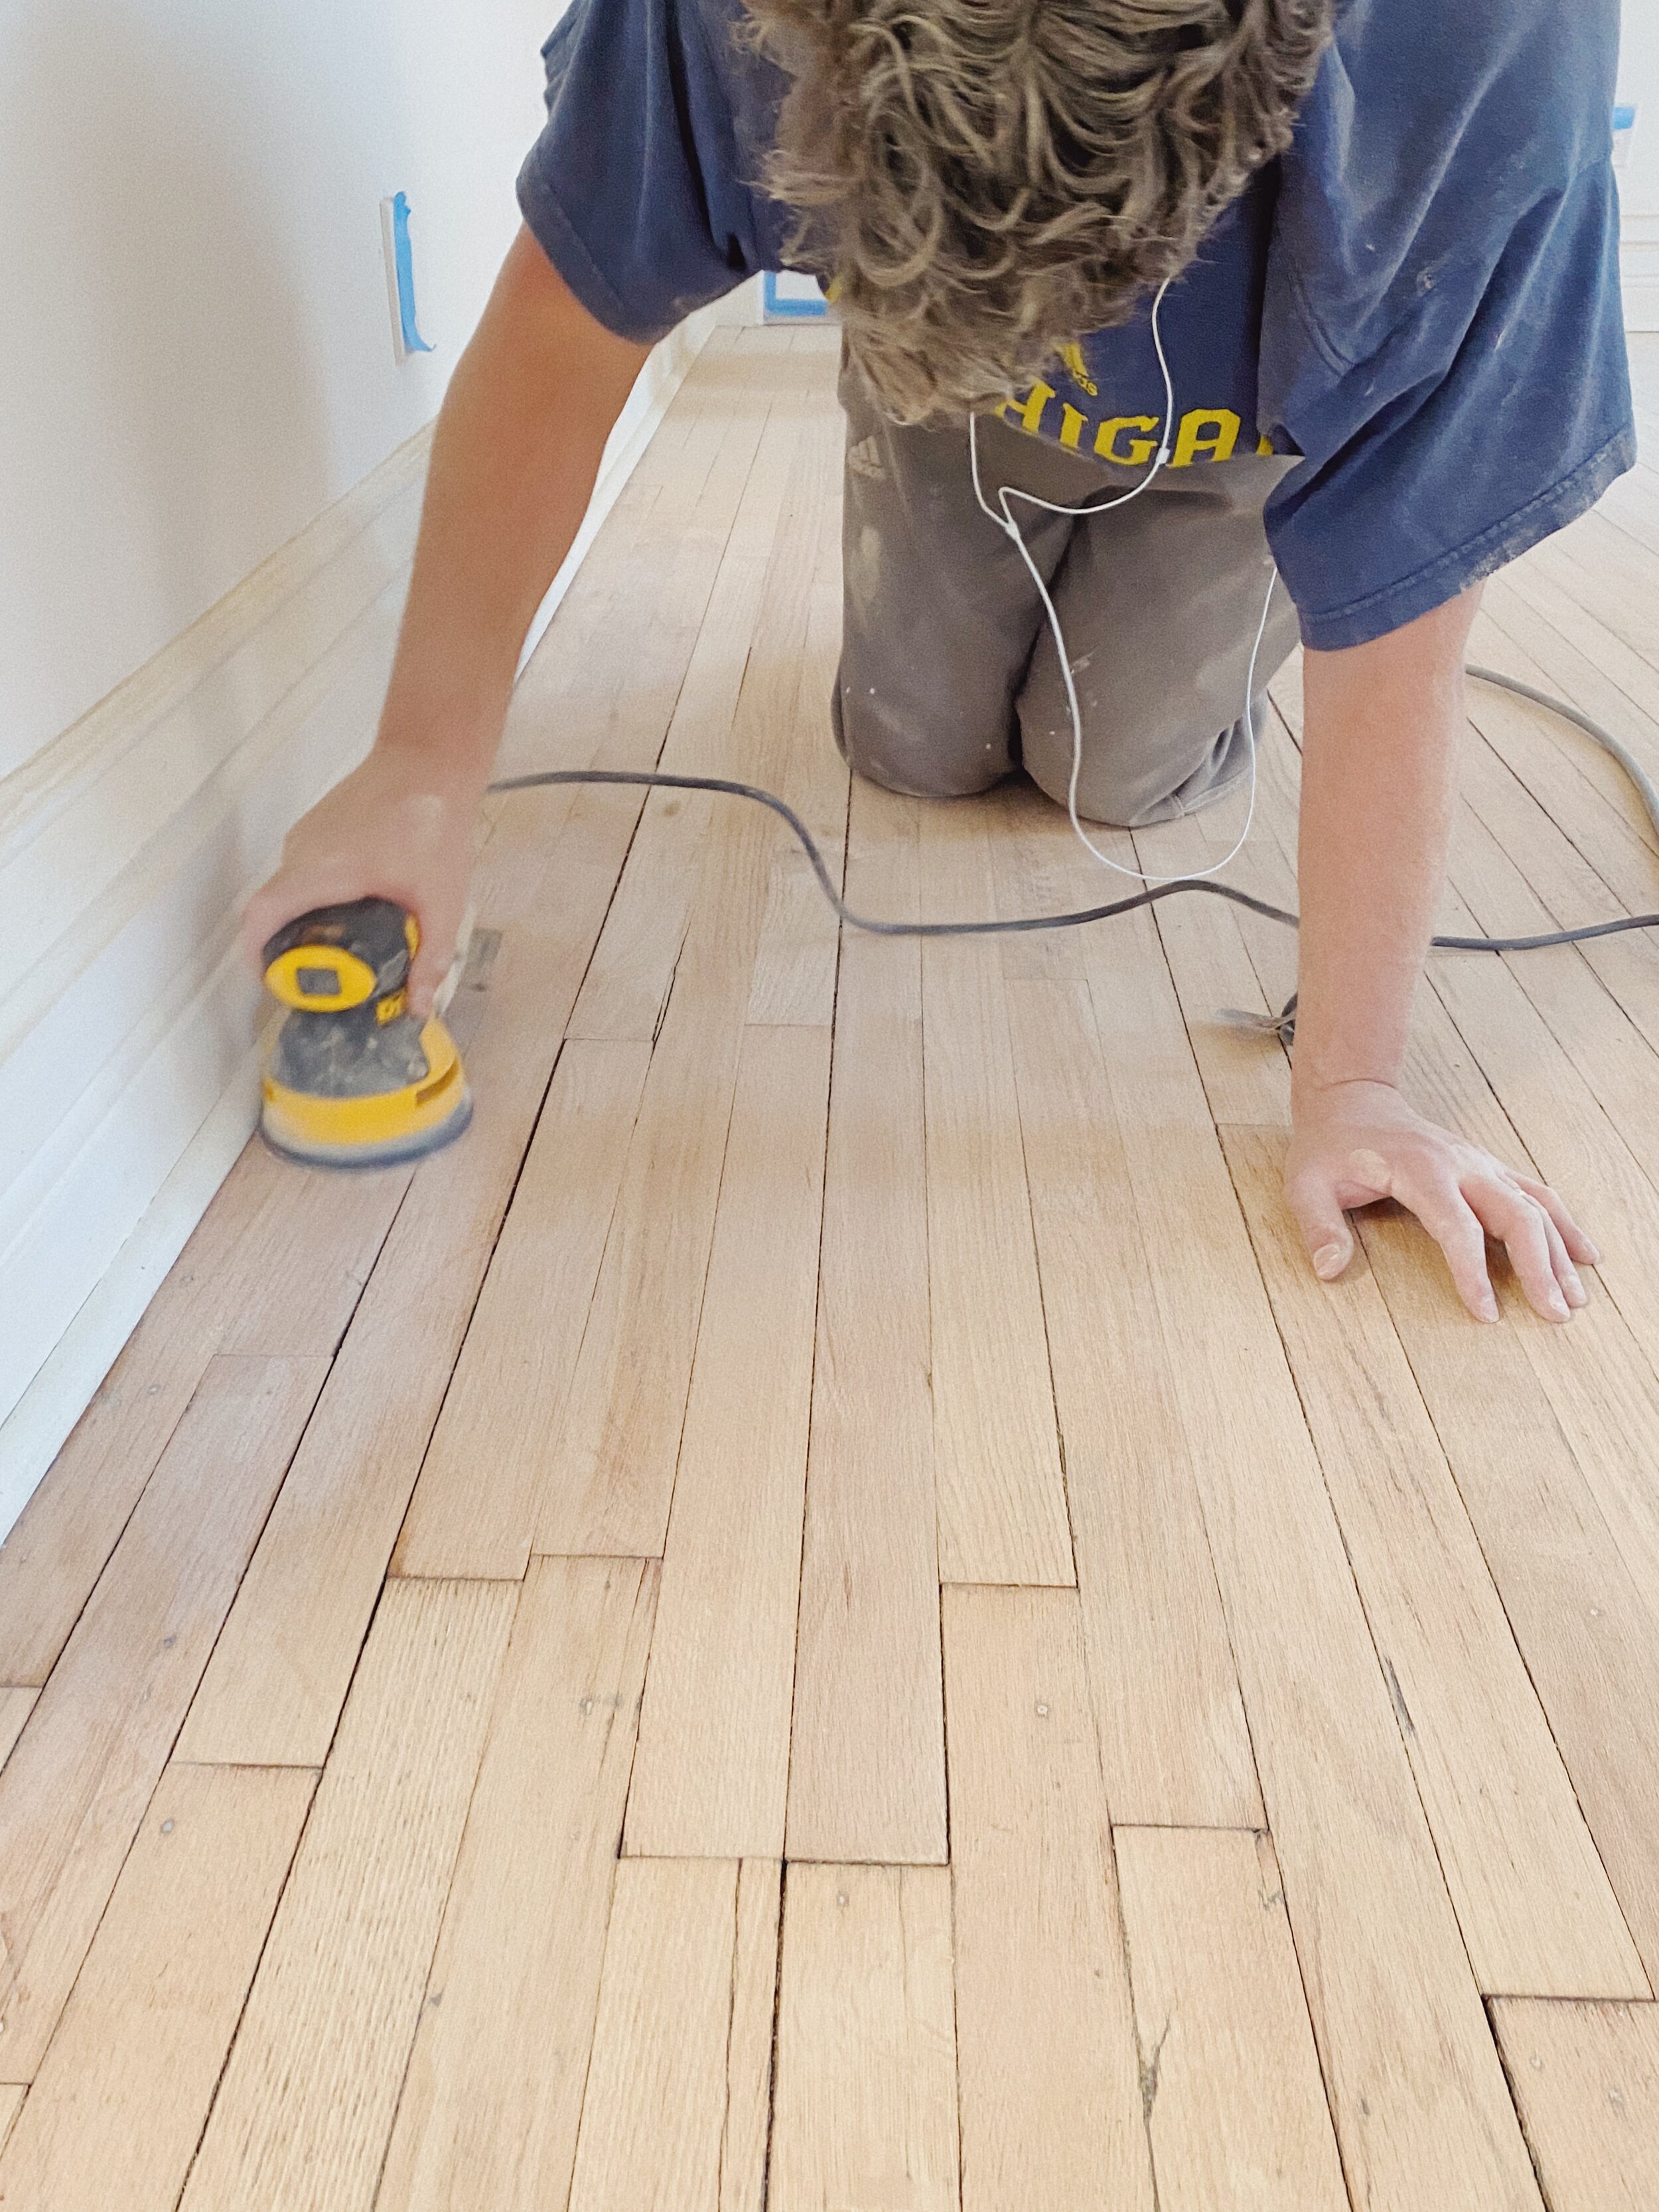
One additional step would be to remove any shoe moulding or baseboards prior to sanding. Removing shoe moulding can be done with a crow bar. We elected not to remove our baseboards, however. Our baseboards are extremely old and custom, and we didn’t want to risk damaging them. It created more work for us because we had to be extremely careful with our hand sander later on, but we figured it was worth it.
With these items in mind, we began sanding down our hardwood, and it was oh. so. satisfying.
After getting the floors completely sanded down with the 60 grit sandpaper, we switched to a finer grit (120). We then gave the floors a once-over with the finer grit paper. For a really professional job, you could run over your floors again with an even finer grit sandpaper. It took about five hours to get our floors totally stripped down.


After completing the entire room with the drum sander, we needed to carefully sand all our edges and around the radiators with the hand sander. The hand sander created way more dust than the drum sander. The drum sander has a large bag attached which collects all the dust particles (and needs to be emptied every so often while you’re working!). The hand sander, however, has a much less effective bag. Make sure you use a ventilated mask while doing a job like this.

The edges of the room and around the radiators still needed sanding
After painstakingly sanding the entire perimeter of each room, we stood back, shook out our hair, and marveled at the space. I filed this look away for a fabulous, future beach house. I love the look of the naked floors, and would love to see this look sealed as-is someday.
At this point, we used wood filler to fill any gaps between boards, nail holes, or other imperfections. After allowing the wood filler to dry, it was time to stain.

We covered our electrical outlets with painters tape
We used a two-person technique for applying our stain. I dipped the applicator brush into a bucket of stain, and applied it to a small area of the floor. Barrett then quickly wiped the stain away with a rag and ensured it was blended into the surrounding stain. It was painstaking, and we took it slowly. I had loved the naked floors so much, I really didn’t want them to turn out too dark. The lighter provincial stain allowed for more variation between boards, and gave our old farmhouse a very French countryside look.


We covered the entire floor with our stain from front to back. It was important that we made a plan for stain application to ensure we had a clear exit without having to walk across the freshly stained floors. After the stain was applied, we called it a night. We needed to allow at least several hours for the stain to dry. Ideally, you should plan for 24 hours for stain to dry.

We woke up early the next morning and planned to spend the day applying the polyurethane sealer to the floors. There are lots of options out there when it comes to sealing floors: Oil-based polyurethane, water-based polyurethane, Shellac, and more. To be totally honest, I don’t know much about Shellac; let’s focus on the two options for polyurethane.
If you choose to get your floors professionally refinished, you’ll likely end up with an oil-based poly sealer on your floor. Oil-based poly is traditionally used because it’s extremely durable and adds a richness in color to your floors. However, each coat of oil-based poly takes 48 hours to dry, hence requiring a week or more to complete the job. Additionally, oil-based poly has an extremely strong odor and high VOC’s (volatile organic compounds). It’s extremely important to use proper ventilation when working with oil-based poly.
We chose to work with a water-based polyurethane. Although water-based poly has been criticized for being less durable, today’s water-based formula is basically just as strong as its oil-based counterpart. Manufacturers have gotten really good at creating a durable compound that will protect your floors. Water-based poly also does not yellow over time, and allows for the true color of the wood to show through. Water-based poly is much better for the environment (low VOCs), is low odor, and each coat dries within 1-2 hours. We’ve been a big fan of the stuff. Accomplishing this project in a weekend relies on water-based poly.
We used Varathane brand water-based polyurethane in a satin finish, which turned out great. We’ve also heard great things about Bona’s water-based formula. To apply the poly, we used a lambs wool applicator. I slowly poured a bit of poly on the floor, and Barrett spread it evenly over the floors. It has a bit of a cloudy tint to it when applied, but trust us, it will dry clear.

At a minimum, you’ll want three coats of poly over your floors. Since drying time with the water-based poly is only 2 hours, we were able to get four coats on our floors pretty easily. After we finished the fourth coat of poly, we admired our work.


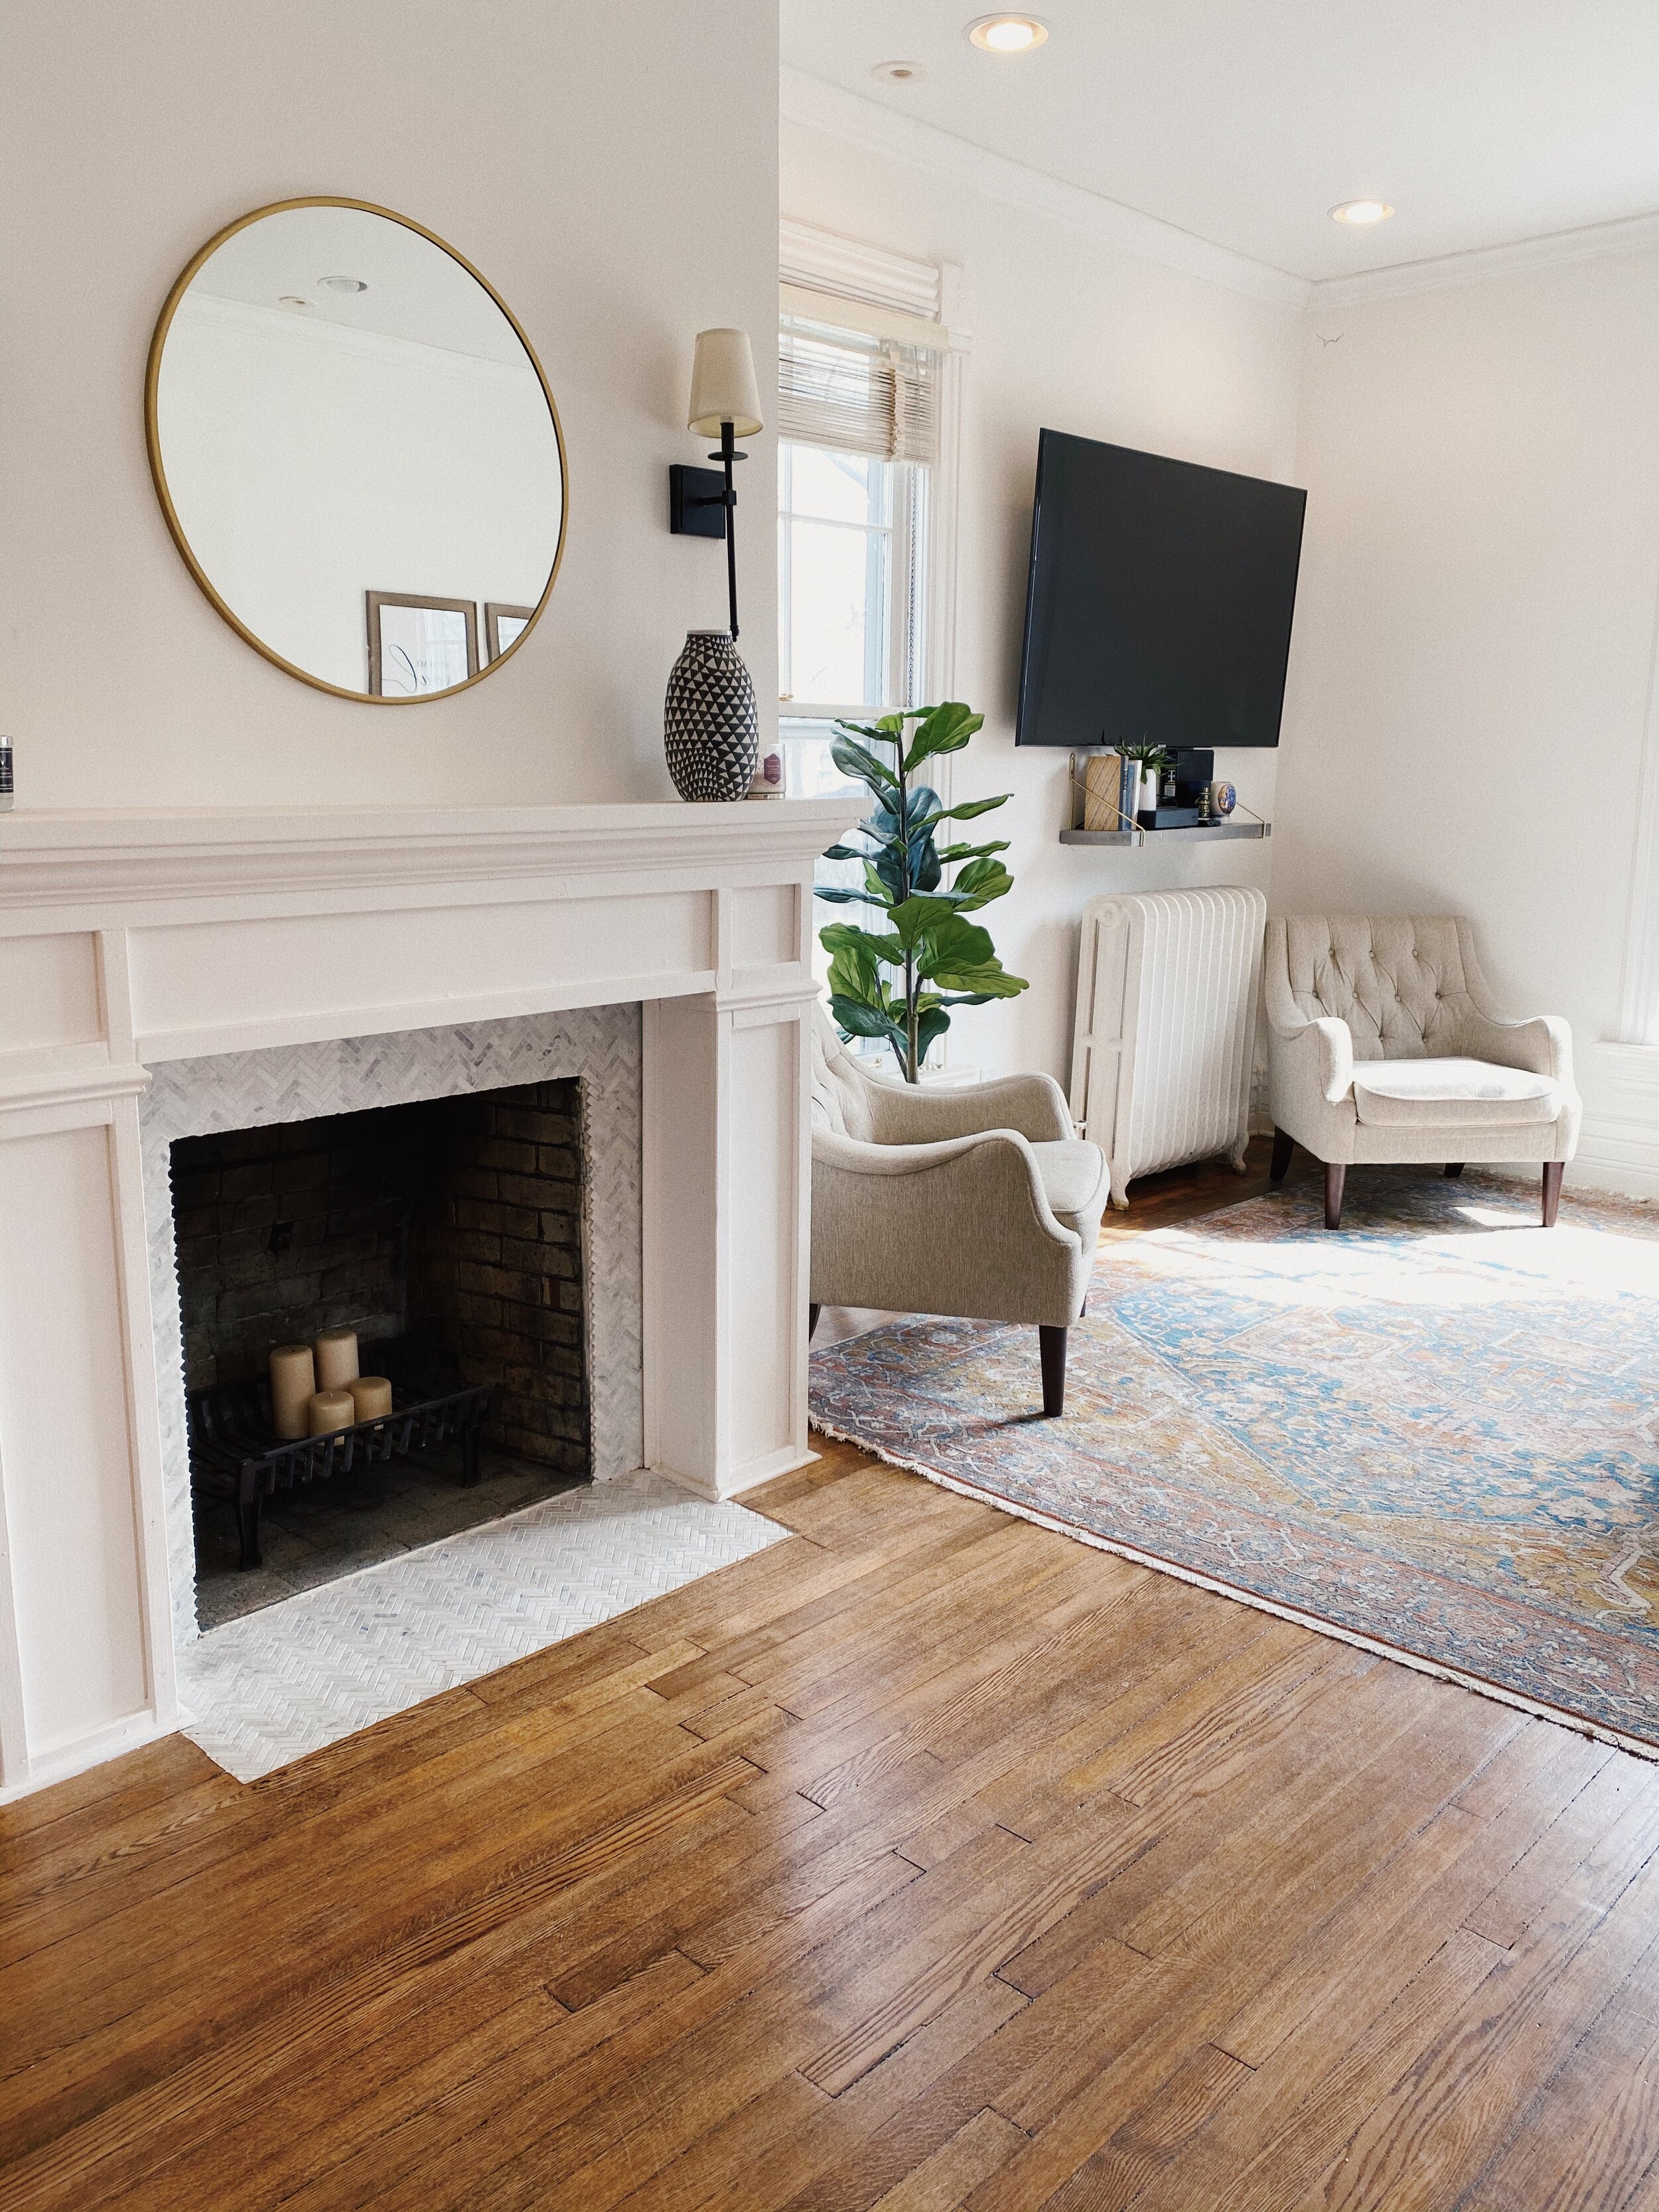
Much less “patina,” but still tons of character.
It’s important to wait 24 hours before putting any furniture back in place. We were able to complete the full floor refinishing in a weekend! By Monday, our home was put back together.
We learned a lot of things along the way. For example, don’t let your dog drool on the floors before you stain; even the tiniest drop of moisture will cause the stain to show up darker. Don’t run the sander against the grain of the floors, you’ll end up with a “patina” that will not go away. Most importantly, don’t obsess over your new floors once they’re finished, homes are meant to be lived in and floors get scratched. It adds character!