Faux Slate Floors

I have this problem. My most recently completed project is always my favorite. But this time, these faux slate floors really are my favorite.
In all seriousness, I cannot believe the difference a little paint can make. Yes, my back is still aching. Yes, my hamstrings are sore. Yes, I realize this means I should be eagerly awaiting the reopening of our gym. None of that matters! This project transformed our standard beige, builder’s grade tile to faux stone in one weekend. Does it get any better than that?
Let’s take a peek at the before on this project.

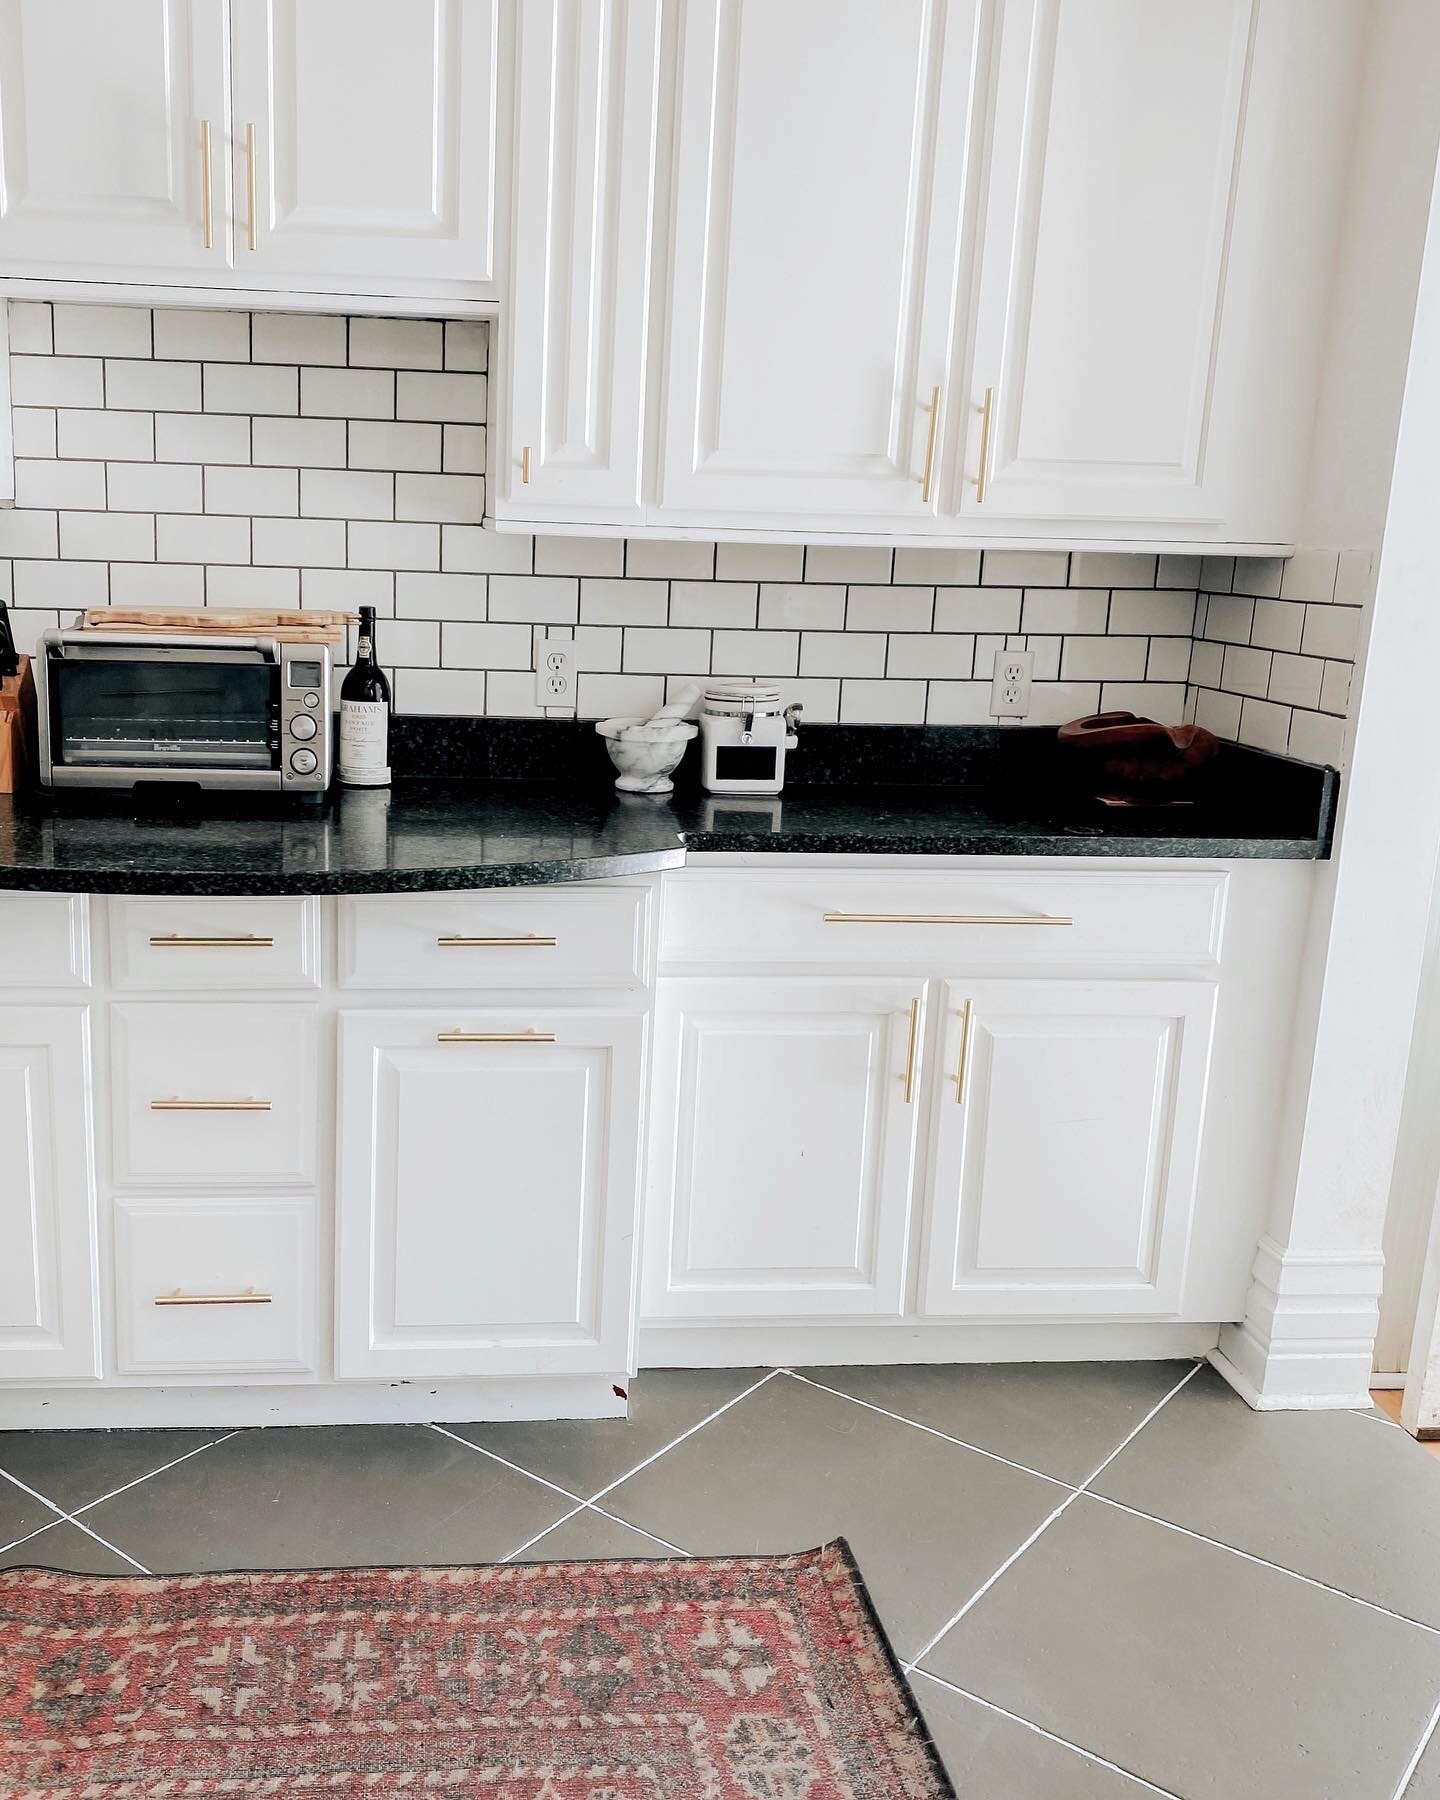
before

before
Now, I’m not going to badmouth builder’s grade tile. What a fantastic material to start with. If you have builder’s grade tile in your home, you get to love it! If you don’t love it, it’s so easy to change. We decided we wanted something a bit darker in our kitchen; so I came up with the crazy idea that faux slate is what was on the agenda.
I’ll try and keep this concise and straightforward for you. Let’s dive in.
What I used for this project:
Behr Chalk Decorative Paint in Fresh Earth
Behr Chalk Decorative Paint in Farmhouse
Rustoleum Home Flooring Top Coat (in matte)
Annie Sloan Chalk Painter Lacquer (in matte)
The first step is always to clean the floors. I use a wet Swiffer, Greased Lightening cleaner, and a vacuum with brush attachment to get everything off the floors.

Next, I went over the floors with Rustoleum latex gray primer. The paint I chose is not intended for floors, so I wanted to be sure to utilize a good primer beforehand. I love Rustoleum products; they hold up so well to our large dog and have excellent durability.

I applied the primer with a roller brush quickly. I didn’t get every single inch of our floors with the primer, but it certainly wouldn’t hurt to get every corner and edge. I waited 4 hours for the primer to dry before applying any paint.
After the primer was dry, I painted my grout lines with Behr Chalk paint in farmhouse. I didn’t worry about painting the grout lines super carefully either; the lines will be perfect after utilizing the 1/4 painter’s tape later on.
Even with just the gray primer and grout lines painter, the floors looked so different already!
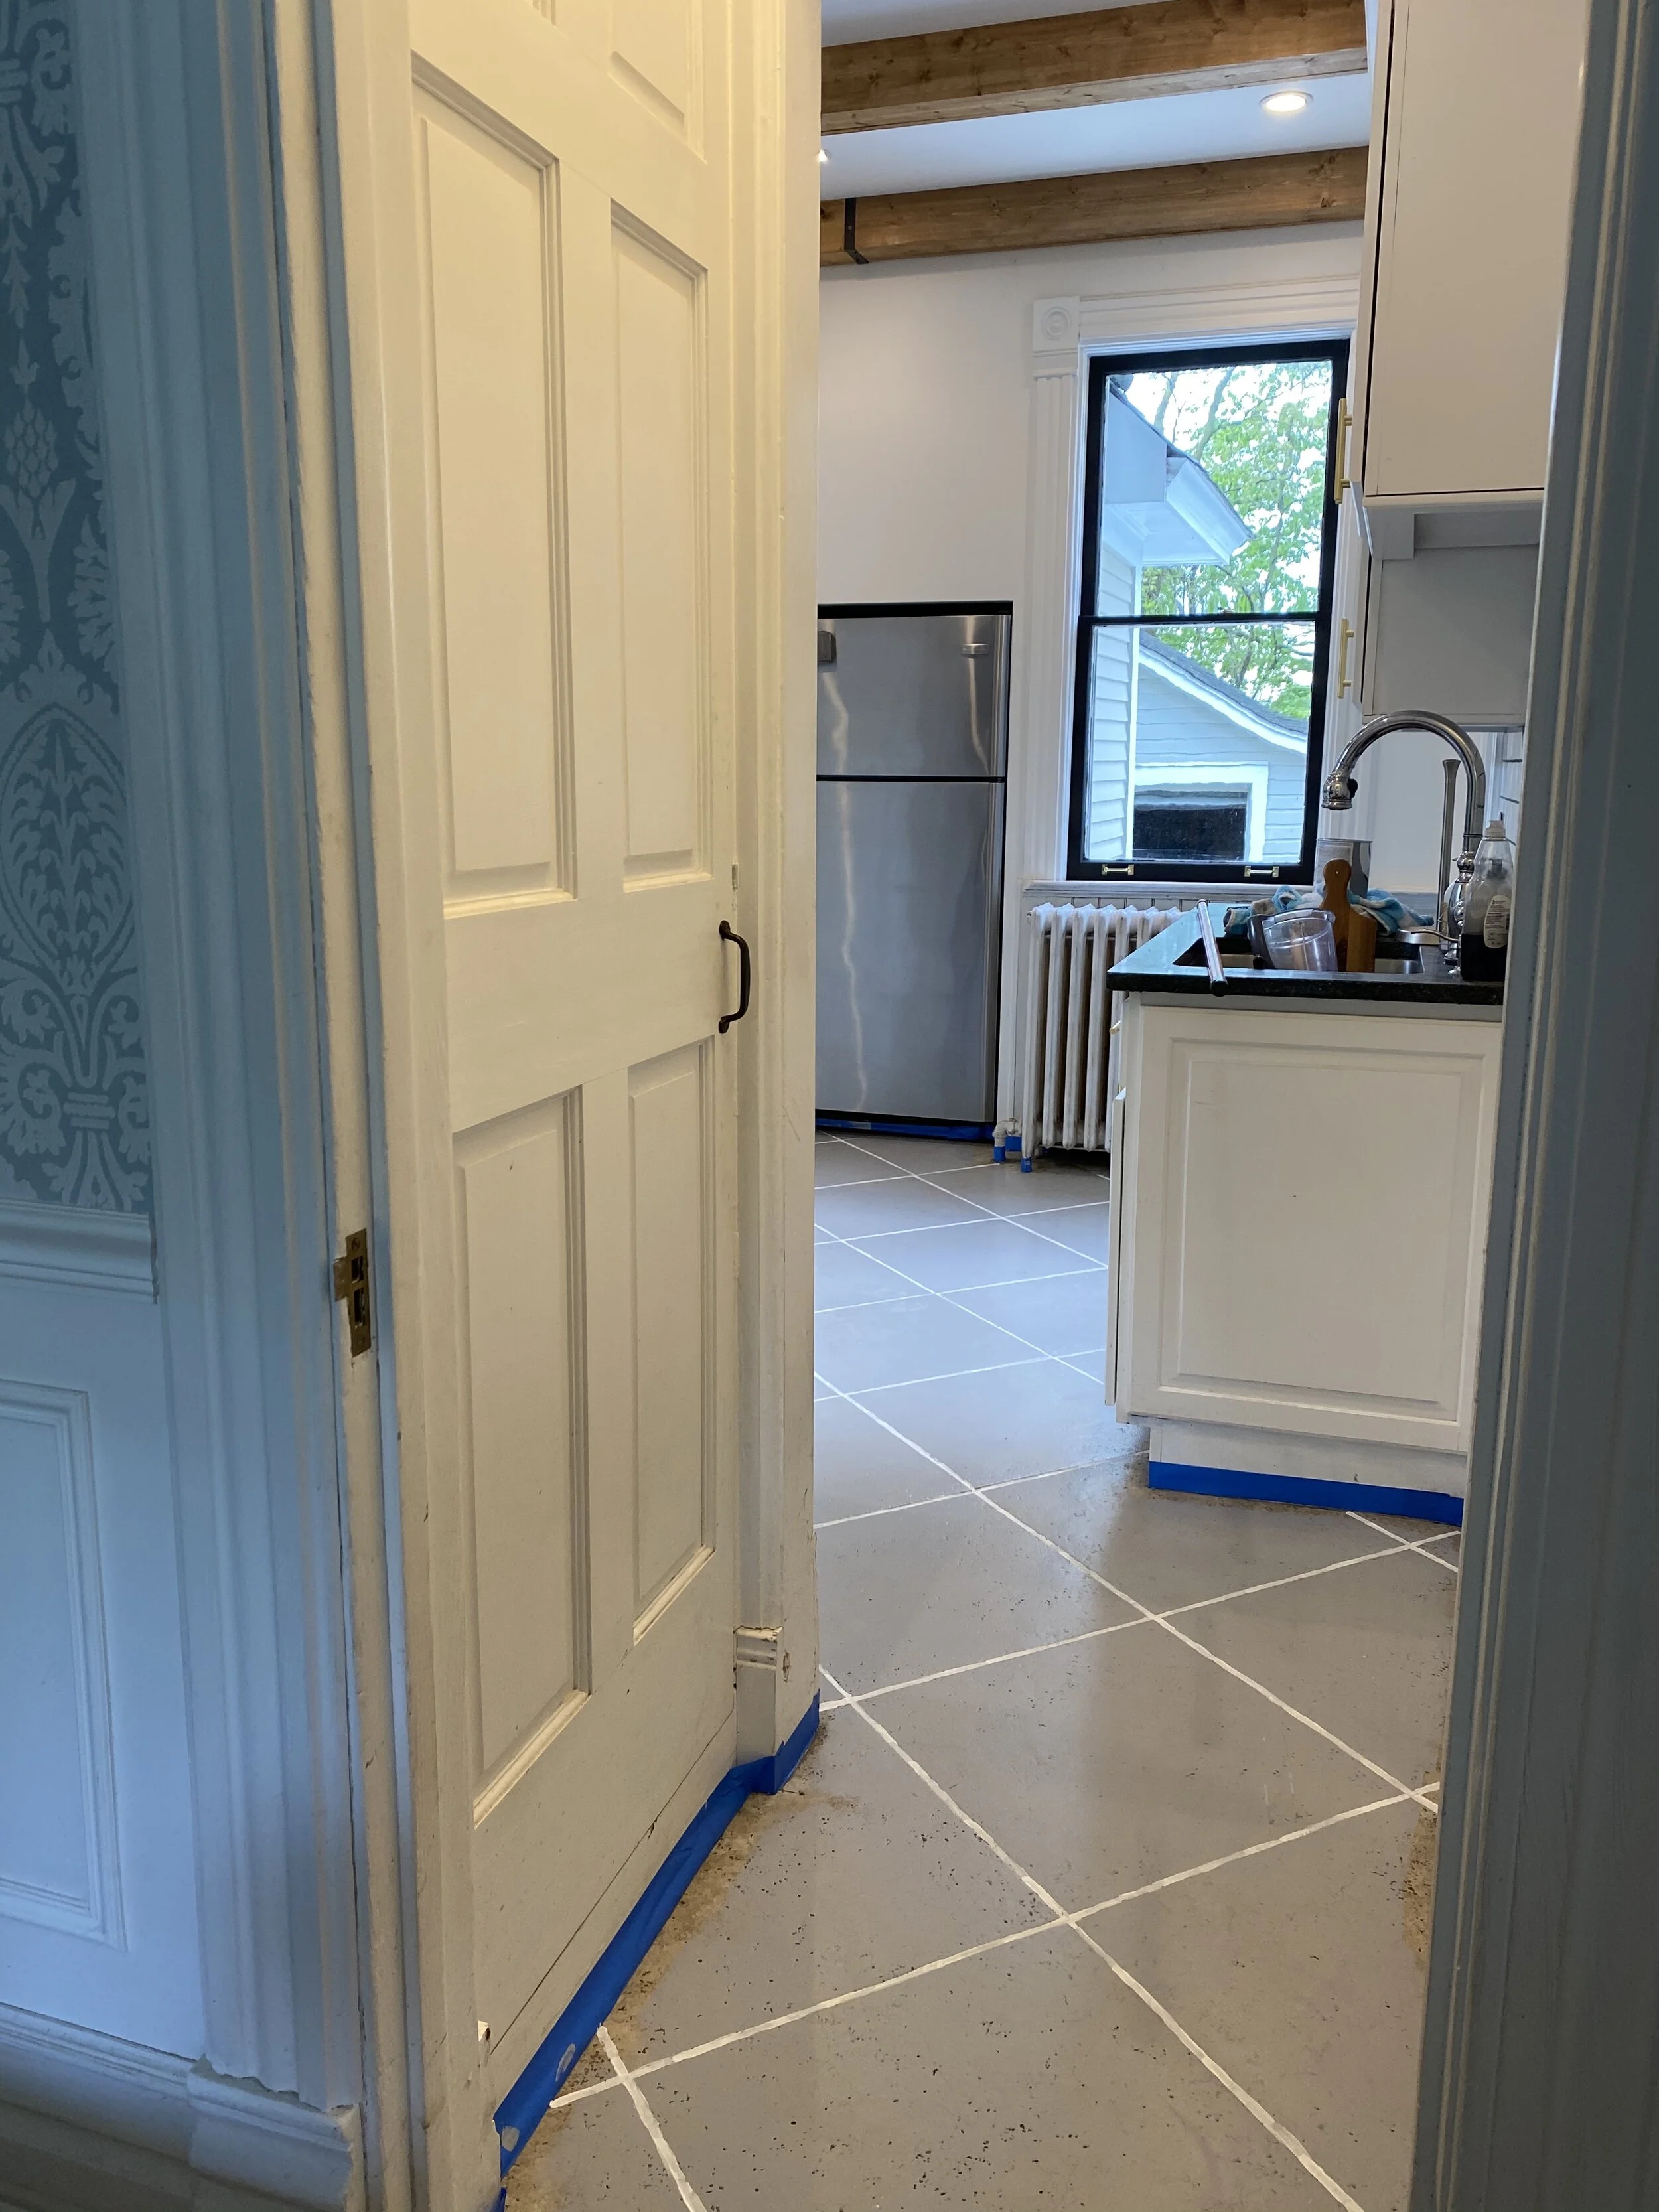

The next morning, I woke up bright and early to start on the “slate” portion of our faux stone.
First I laid down 1/4 painters tape over all my grout lines to create straight, uniform lines. I then went over the grout lines with a little bit of chalk paint in farmhouse to seal the edges of the tape down.
Next it was time for main event. I used Behr chalk paint in Fresh Earth for the slate. This color created a really realistic stone look, in my opinion! I applied the paint with a medium sized foam brush.

This is the part that really starts to hurt the back. Push through! It’s so worth it.
I used two coats of Fresh Earth, and then waited for it to dry for a minimum of 2 hours. After a few hours, I pulled up the tape to reveal the grout lines beneath. If the tape pulls up any of your paint, you can go back over with a tiny paint brush to touch up any problem areas.

Finally, it was time to seal the floors. I used two different sealers to create a hazy effect that creates a true “stone” look. Most sealers/lacquers recommend only one coat. It will start to cloud if you use multiple layers, however in this case, that’s exactly what we were going for! I used Rustoleum Top Coat and Annie Sloan lacquer.


I applied the lacquer with a small roller brush evenly across the floors. Be sure to allow it to dry between coats. We waited 24 hours before allowing foot traffic.
And that’s it! The floors are a total game changer to this space. Check them out.