

Faux Ceiling Beams
It’s finally here! Our faux beam’s are complete, and I could not be more obsessed with how they turned out. I love this project because it creates a much more “custom kitchen” feeling our in space. I’ve written about our poorly laid out, not-so-custom kitchen problems in the past. As much as I would love to have cabinets that went all the way to the ceiling, I don’t. However, our new faux beams slot in right above our cabinets; the entire space feels so much more custom, inviting, and intentional.
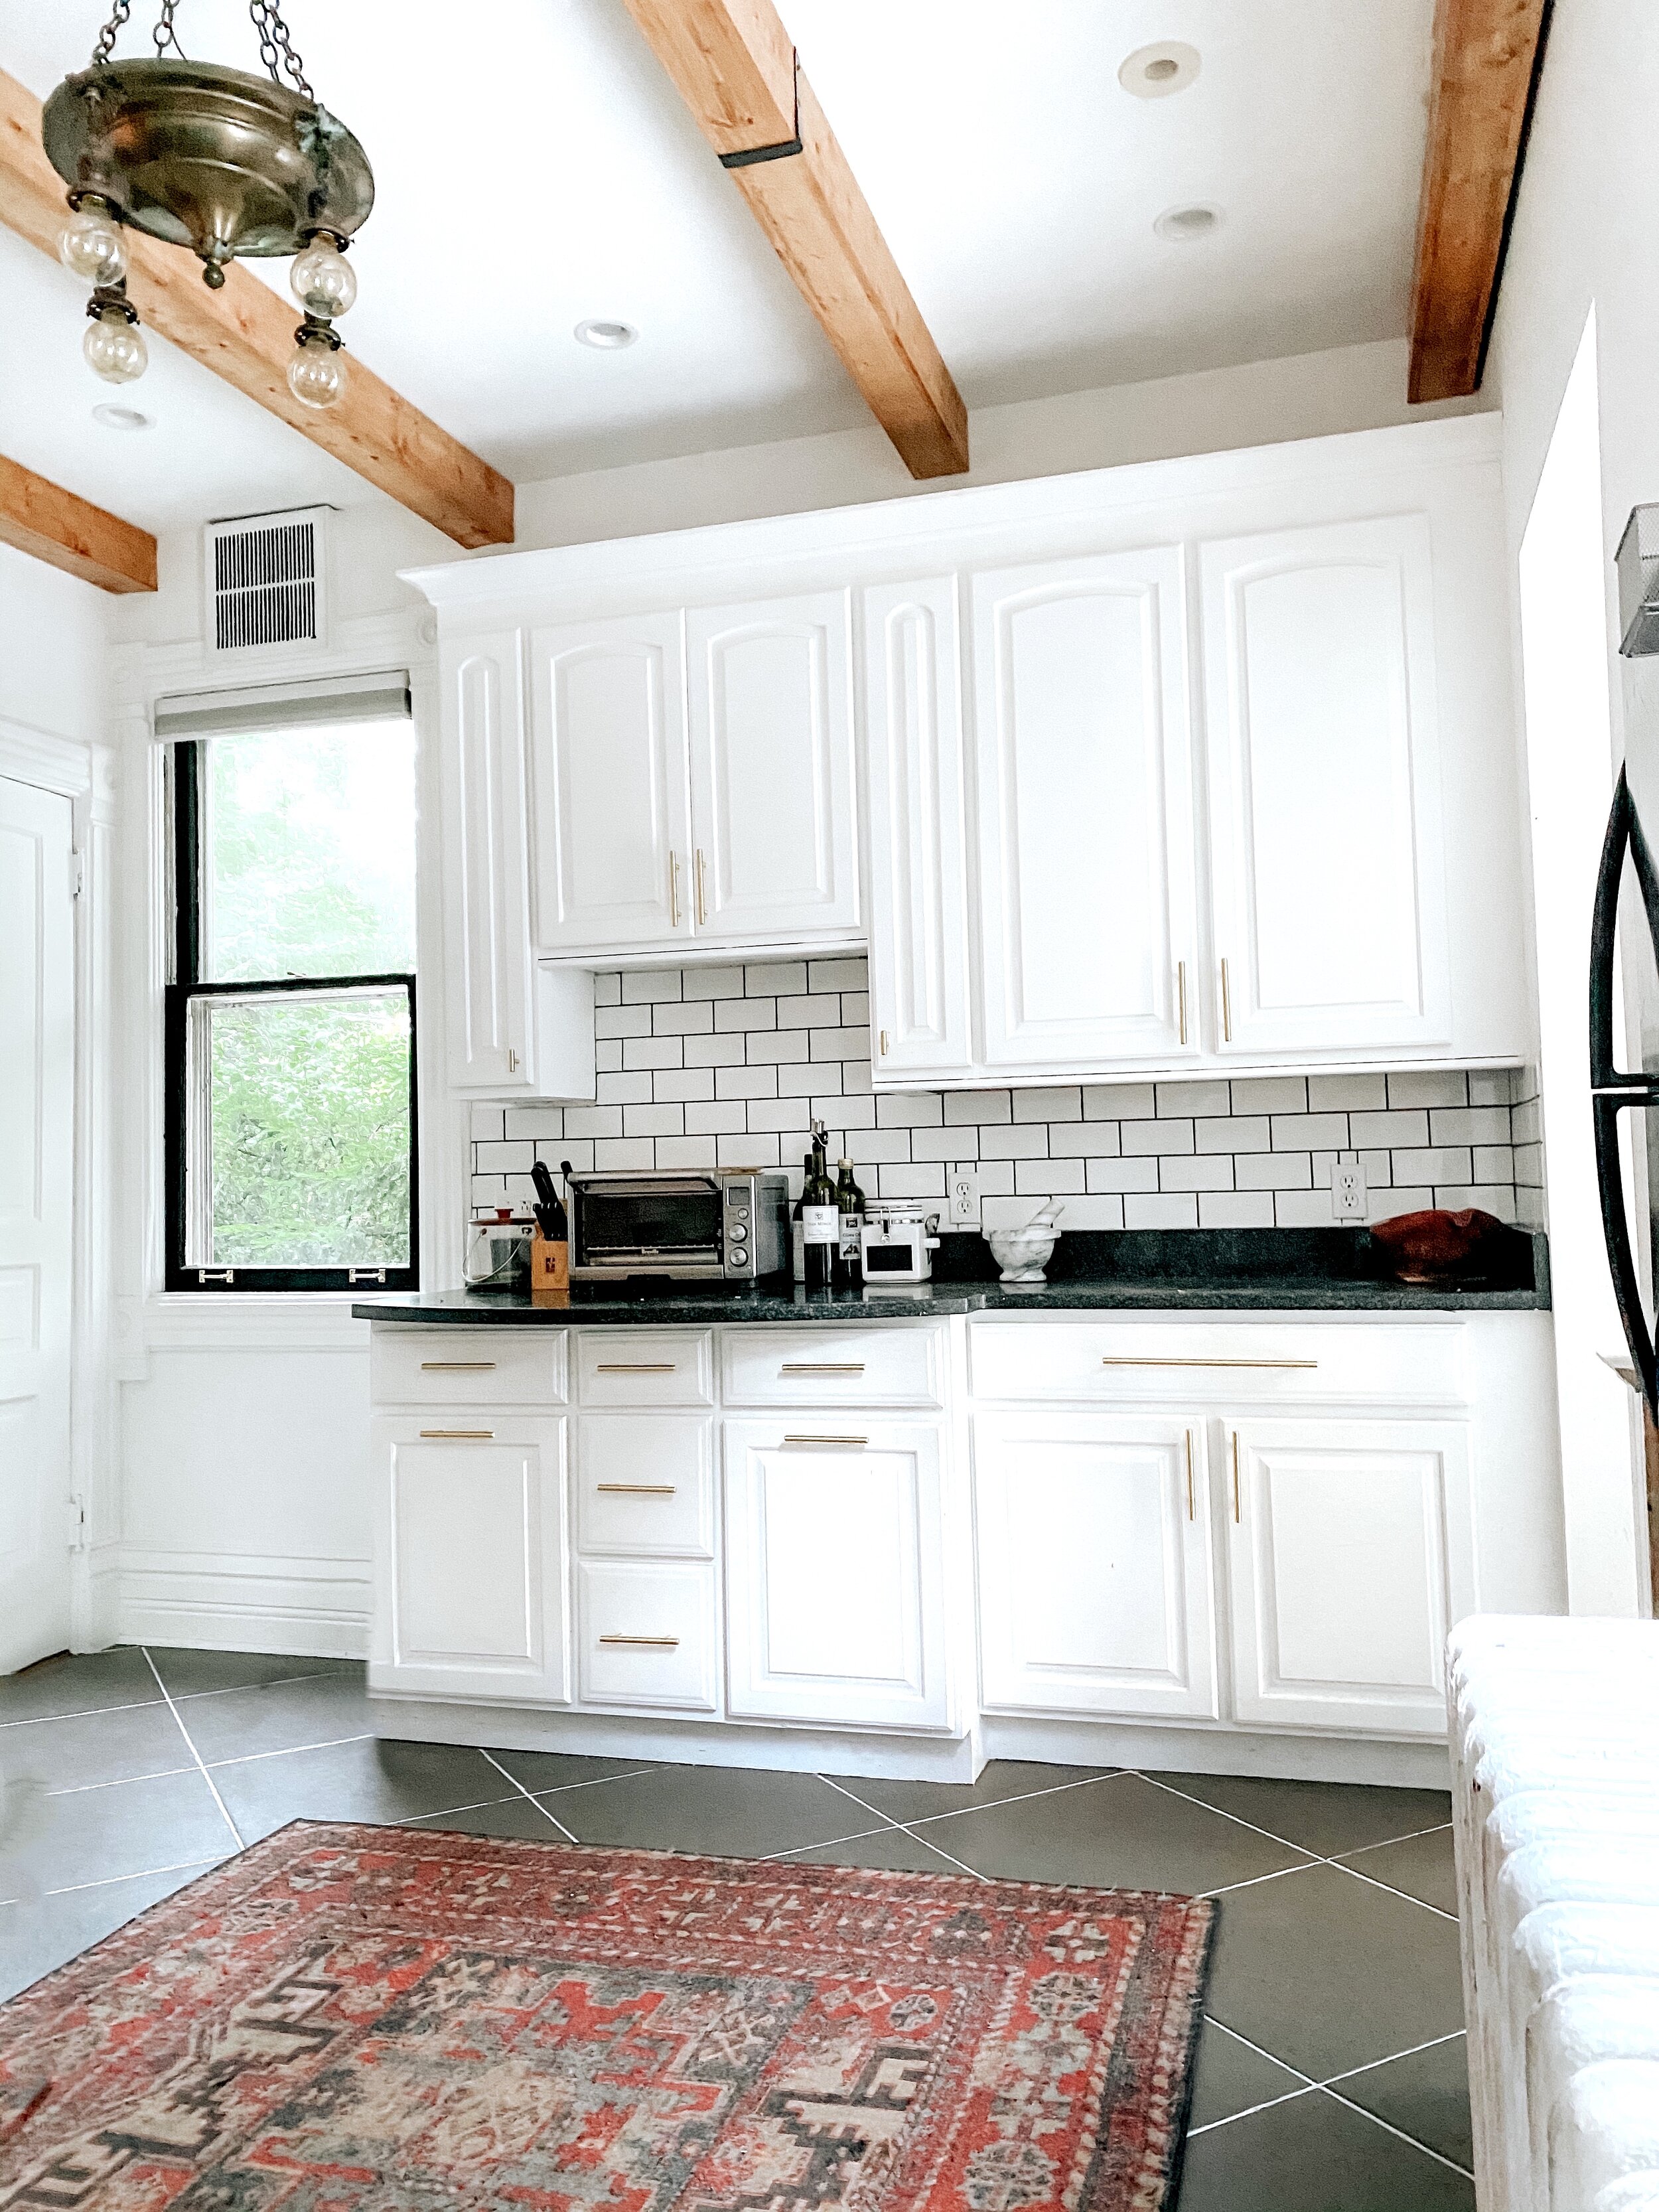
Let’s take a quick look back at what our kitchen looked like when we moved in.

We got lucky with super tall ceilings in our house (12 ft!), so we weren’t worried about creating too much visual clutter. Our beams live above the line of sight, but add tons of interest to the dead space above our cabinets.
In keeping with my no frills promise, let’s dive in:
Materials:
2X4’s (as anchoring wood)
1X4’s
1X6s
Varanthane wood stain in honey
Varathane wood stain in provincial
Clamps
Finishing nails
3 in construction screws

We first gathered the wood we needed. We used inexpensive 2x4s to anchor the entire beam to the ceiling and a nicer hobby wood at the actual “beam” pieces. We used (2) 1x6s and (1) 1x4 to create a perfect square “box” for our faux beam.
Step one was to stain all our wood. We used our own stain mix, so it was a little tricky to get all the wood to come out evenly. Our go-to stain mix is honey and provincial. The honey warms up the color of the wood, and the provincial kicks off the extra gold and yellow tones. I first sanded down the beams with the Dewalt hand sander, and Barrett began to stain.

After all the beams were consistently and evenly stained, we strategized about the best way to get them on the ceiling. Our kitchen was more than 12 ft. long, which meant for us that the beams needed to go up in two parts. Unfortunately, our car really can’t transport any lumber over 12 ft. We could have gotten the wood delivered, however installing in two pieces was actually fairly simple. We would just need to figure out how to disguise the seam later.
We anchored our beams to the ceiling with a large piece of 2X4 construction wood. It doesn’t need to run the full length of the ceiling because it will be totally hidden.

We used a stud finder and construction screws to make sure this piece was truly secured to the ceiling. The faux beam boards will be nailed into this long piece. After the construction wood was up, it was time to build the beams.
We nailed together three sides of the wood on the ground to ensure the tightest possible seams. Remember this is supposed to look like one piece of wood, so hiding the seams is key. We used two clamps to hold the stained boards together, and then nailed into the sides.


After nailing the pieces together, it was time to pop the “beam” up onto the ceiling. We slide the “box” onto the construction beam and then nailed directly into the construction beam.

The “box” slides right over the piece of construction wood.
We repeated this process until each box was up. Putting together three sides of the beams on the ground, sliding it over the construction board, and nailing into the construction board. After all 4 beams were up, we needed to find something to disguise the seams.

All four beams up, but seams are still visible.
Since we did each beam in two “halves” we needed to disguise the seam where the two halves meet. We decided to use a piece of metal to cover each spot where the halves meet. Although, using a metal strap was a bit more industrial than I wanted to go, we decided it would be the best possible disguise.
We purchased a metal strap, cut it to size (18in) and bent it to fit the beam. We needed to form the metal strap into a “U” shape. This metal was super flexible; we were easily able to bend it with a little help from a rubber mallet.


After the straps were all bent, we tested them on the beams. The metal didn’t always fit perfectly at first, but we utilized the rubber mallet to continue shaping these pieces around our beams. It’s ok if the metal gets a little “hammered” we’re going to go with a hammered finish on these anyways!
Once we were happy that that the straps fit, it was time to finish them. We used Rustoleum Universal Hammered Finish Spray Paint in Black to achieve the perfect finish.


The paint creates a hammered look.
We secured these pieces to our beams using a drill and screws. We placed each strap over the seam where the two halves meet.
And that’s that! The beams were totally completed, and I am so happy with how they turned out. These beams truly warmed up our kitchen and gave it a more custom feel. Check it out below.


